What follows are periodic reports as the XRX kit was being made. Many of my plans, prices and features changed as the kit came together. Ignore all pricing in the following unless in matches with the information on the Hooligan XRX page.
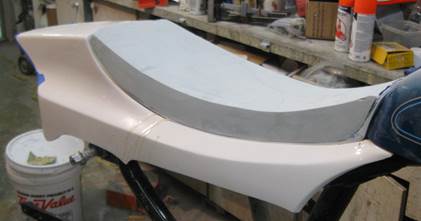
Okay, in the last report I showed you the completed XRX seat base. Now I’m a day away from finishing the pattern of the seat foam. I’m going to make a mold and produce my own foam from now on because foam costs from the California maker were killing me.


Here are two shots of the foam pattern. When that’s done I’ll finish the pattern for the fender support bracket/brakelight & license plate holder which has already been started. This has been a very long process and I’m sorry but I’m distracted by so many other concurrent projects. (I have the new style black side left side covers in stock if you want to replace that metal crap that holds the battery in.)
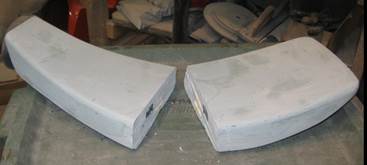
My last report was 10/14/15 which means I’m slow, but you already know that. I am, however, persistent. I have kicked the XRX project into high gear and will devote my time to completing it. Over last week I have roughed out the new rear seat support bracket which will hold taillight and license plate. Here are shots of the bracket:
 My goal is for the bracket to show a rearward face that blends with the tail end for a more finished look. I have yet to build the taillight/license plate mount which goes in that low hollow.
This bracket will be for first Evos through 1993. In the next shot you can see that early frame behind. I am making it first because the 94+ frame (foreground) has a lower mounting surface and it will be easier to change the -93 bracket by adding material to it so it drops down to the later model seat rails. More when I have it.
~ Phil
My last report was 2ish months ago. Now you know I work at the pace of a snail. It’s that old ‘too many projects at one time’ thing. This is a follow up on the seat foam pattern I showed you last time in two pieces:
I’d split it to add 3/8” to the length because the actual foam when it comes out the mold shrinks and the pattern has to compensate for shrinkage. Here’s the final foam pattern:

It was rejoined, then coated with Duratech and sanded. Next came another layer of gelcoat in some traffic green stuff I had on the shelf. It was sanded from 340 wet/dry down to 2000 wet/dry, then polished and coated with 5 coats of release wax. I took these photos and boxed it up to ship to foam maker in California.
The next report will on the last piece--the license plate/light holder.
~ Phil
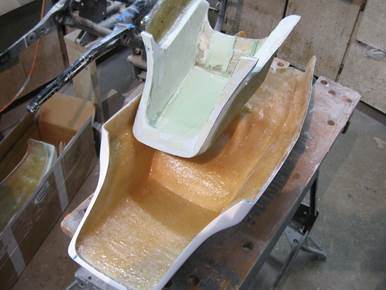
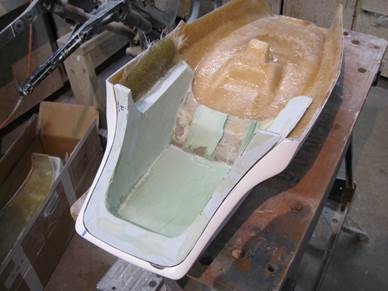
I looked back when this project began. It was February of 2014. I am one slow puppy. Okay I have a big report this time. In the last report I showed you the pattern making for the seat foam. It started as a pile of Bondo:
Then it was finished off to a polish just like any fiberglass pattern then sent off to the foam molder in sick green gelcoat (which I got free from a supplier):
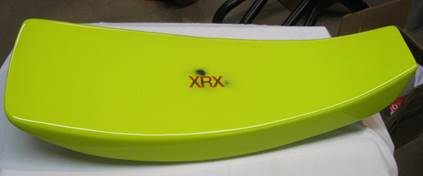
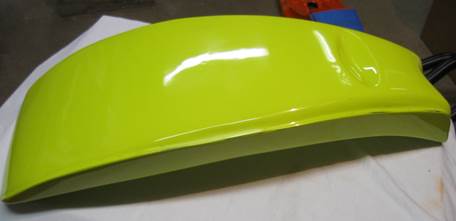
I got back 10 foams pieces and had one covered in my traditional SXR pattern--gun fighter top with smooth sides:
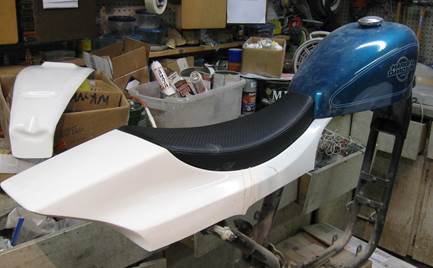
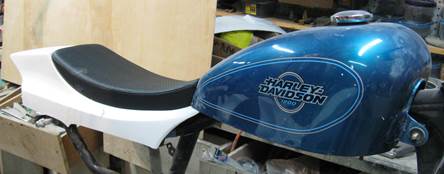
The end result is pleasing. It snuggles up against the tank nicely and tapers away to nothing at the back of the tail. Just what is needed for a slick looking end-product.
That chunk of the tail that juts down from the tank looks out of place, but it’s not. On both sides that corner blends into the oil tank and side cover--not to worry. This design gets the tail working with the tank. That is a great failing in other designs--they have a gap between tank and tail. Why bother slapping pieces near each other when there is an alternative?
If you compare the bottom edge of the tail with tail photos in earlier reports you’ll see it’s straight. I used to have bumps at the back which were going to be tabs for rear mounting. I absolutly hate hardware showing on the outside of my glass-so I killed the tabs and am working on a hidden internal rear mount system. Notice that little peak midway back on the tail edge-the other side has one too. If you go back in my reports you’ll see these little shapes conform to the oil tank and my new side cover on both sides. The idea is to blend everything in a planned way.
Okay part two
Last report I showed you this internal rear mount system:

I said then it was becoming a massive chunk of glass. It looked nice but it would have increased the cost and your price. So I trashed it.
The new mount piece is more abbreviated and will save money.

I will make a dedicated license plate holder/taillight holder seen here:

And I’m going to use a less expensive Lucas style light so the end of the tail will look like this. The blue tape covers the lens so I don’t muck it up with Bondo. The license plate holder comes with a white vinyl protective cover over polished stainless steel
All I have to do at this point is finish the pattern for this new piece and the project will be done. I’ve done some estimating and it looks like this tail assembly (tail, seat, license plate/taillight holder and taillight) will cost about $500 to $550. That’s still a guess but we’re gettin’ close. No pre-orders at this point. I want to have all my ducks in a row and production under way so I can ship products in a timely fashion-not the 2+ months it now takes for my SXR kits
When I get all the pieces in fist I’m going to make up XR style graphics and paint the stock tank and the tail XR orange and have photos made with painted side cover and oil tank. That will give you a true way to judge if your money will be well spent.
Thanks,
Phil
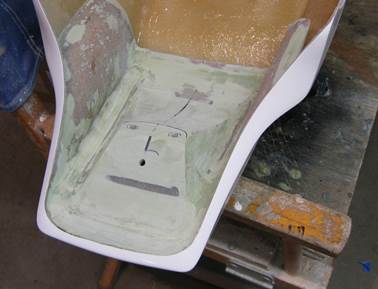
You are looking at the rear support bracket for XRX tail. It is designed to rest on the seat rails to support weight only. Attachment and positioning happens at the front of the tail.
![]()
![]()
You remember me saying some time ago that this brace in its first configuration was way too complex and thusly I launched in a more simplified direction. Then a Eureka moment happened. In the past we had to make two support molds--one for Evos up to 1993 and another for 1994 to 2003. This new support is vastly more complex but it allows us to use only one mold to pull both parts.
![]()
![]()
The photos show the support in the “94” shape. The drawing shows how we cut off the 94 mount and presto the lower 93 mount is exposed. I don’t know if other motorcycle glass guys make molds this complex but I expect not. The whole idea behind this ‘thing’ is not to show any hardware being exposed on the outside of the tail. Others show hardware because it’s cheaper and simpler. Not us boy--we take the long way round the barn. But the net effect is a cleaner looking product.
![]()
This part will save me lots of time too. The support will be glassed as the tail is made... before I’d spend an hour reading and attaching this part to the tail. Sadly this simplification only saves me time but does not lower product cost. The remaining part is the light/license plate mount which will be fabbed up as this part is made mold-ready. Soon we should have the final cost and production begins (after 20 years).
~ Phil